Followers

Showing posts with label Friday Show and Tell. Show all posts

Friday, 16 November 2012

Technique Focus Friday November Double Pocket Card

Hi everyone its Kaz here with a Technique Focus Friday for you this time, I will be showing you how to make a very simple Double pocket card just right for your Christmas cards.


Supplies
Score board and tool
12"x12" card stock will make a 6" card
Scissor
Double sided tape  
Backing paper,embellishment of your choice.


1. I have stared with a 12"x 12" light card stock mine is green on both sides up you can use double sided pattern paper as well.
Score your paper at 6"sideways and longways.


2 Cut your card to the center.


3 Fold the bottom right hand corner to the center.


4 Now fold the top left hand corner towards the center but don't go all the way leave about a 1/2 ",this will form the back pocket.


5 Add your double sided tape where shown on the picture.
Then sick them down your card should now look like picture 6.


6 Now add more tape where marked in the picture above.


7 Now fold and stick down the top left hand side as shown above.
This will give you your 1st pocket.


8 Fold the bottom right hand corner over the pocket to have just made and stick down,you should now have you double pocket card .
Crafty Hugs
Kaz.
XxX


Friday, 12 October 2012

Homemade Daybook Tutorial...

Having recently fallen in love with the Amy Tangerine Daybook, I decided that I wanted to have a go at making my own....after all that is how Amy came up with the idea of the books...she made one with scraps left over from a demo she was doing at CHA...

So the first step is to make a cover. I use Bazzill Kraft cardstock and a piece of overlay/acetate.
This book measures 7.5 x 5.5 inches. The overlay/acetate measures 5.5 inches deep and is very slighty shorter that the cover so that it doesn't hang over.
The inside pages are made from double sided papers...if they are a little thicker than paper that is better as it gives the pages more support. Cut them in a variety of sizes smaller than your cover.
As you can see I have included some envelopes in my book, plus used some decorative edges to the pages...plus some washi tape and stickers.
More of the inside pages...
More of the inside pages, envelopes and stickers...
Now back to decorating the cover. I added some washi tape to the inside and sticker that goes with the paper range I used. I stuck the sticker over the busy overlay/acetate on the front so that it created a place to put the title of the album at a later date.
The inside of the cover is decorated with more washi tape and another sticker.
Now the cover and insides are ready I added the clips to hold all the pages in place ready to make the holes for hand sewing the book together.
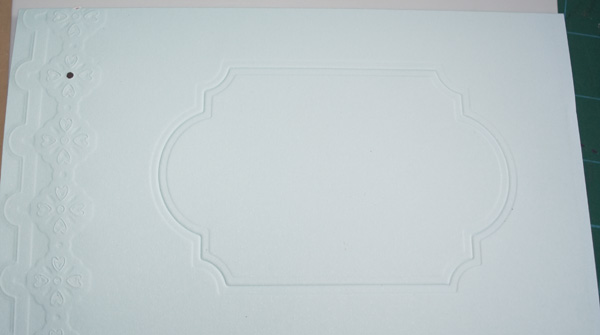
As you can see in the picture I have added holes down the centre fold of the album using an embroidery needle and foam mat.
When I start sewing from the second hole down and then back one hole and forward two holes....it means you over sew, but it makes the binding nice and strong.
More of the sewing...
A close up of the sewing.
Further down and you can get more of an idea...
Sewing all done, and as you can see you get a neat(ish) sewn line down the centre of the daybook.
Here is the sewing from the outside...
And finally the finished daybook with a paperclip added to hold it together neatly.

I hope this explains everything, and inspires a few of you to have a go at your own book. It is a great way to use up all the pieces of patterned paper you have laying around. Also it is a great saver as the Amy Tangerine Books cost between £6.99-£9.99, and I have estimated that this book cost me about £4 to make and it is utterly unique. If you are a cardmaker with mainly 6x6 pads laying around then don't think you can't have a go at this...I have made another album that is just 6.5 x 4.5 inches and all the pages inside are made from a 6x6 paper pad.

Saturday, 22 September 2012

Pop up Christmas card tutorial


Hi This is my first Tutorial for the Crafty Bloggers Network 
I have seen this shape card on a few blogs lately so here is my take on it.

o

Supplies 


12x12 card stock mine is  from The Christmas glitter stack from DCWV
Spellbinders dies
Clear stamps from Papermainia
Promakers
Ribbon
Glitter, Gems & Card candy


Cut your 12x12 card down to 6x12,


then score at 1.5",3",4.5",7.5",9",and 10.5"


When folded it should look like this.


With the other piece of 12x6 card stock cut a rectangle 5x7"
I used a large spellbinders die but can bee done by hand.
Then tape you 5x7" rectangle and stick it to the bottom of the12x6".
Now add the ribbon this goes between the 1st & 2nd fold.
Then stick the 2 ends together.


It should now stand up like this,
you can now add your image and embellishments, your card will fold flat for posting. 


Crafty Hugs


Friday, 17 August 2012

Friday Show and Tell #6 with Angela


Embossing with your cutting dies


Taking a card blank, tape your chosen die in place with low tack tape on the reverse side. Place the card and die with the ridge side of the die facing your tan (or silicone) mat as below


(I used a Grand Calibur for my card but you can use any machine, just cut the card size to fit your machine and use the appropriate sandwich listed below.)

Place the base plate on the card using the fold line for your guide as you do not want to emboss beyond the crease in the card.


Run through your machine.

Once you have done this you have a card with one side embossed (if you use a similar die to mine)

I then ran the card back through my machine with another die taped to the front giving me the following result:


In order to emphasise the embossing you may wish to ink the front of the card like so:


Here is my finished card:


Of course all this can be done equally as well onto a piece of card which you would matt and layer it to the front of your card blank.


Big Shot:

Embossing Sandwich
1. Multipurpose Platform, Tab1 (flipped open to Tab 1)
2. Clear Acrylic mat*
3. Spellbinders™ die, blade side up
4. Paper or cardstock
5. Spellbinders™ Tan Emboss Pad
6. Clear Acrylic mat
7. Roll through Big Shot

Or Embossing Sandwich 2
1. Big Shot Impressions Starter Kit White and Black Mat (I believe that Big Kick has one of these as well, but I am not 100% certain)
2. Spellbinders™ die, blade side up
3. Paper or cardstock
4. Big Shot Impressions Starter Kit Black Impression Mat
6. Clear Acrylic mat
7. Roll through Big Shot

Cuttlebug :

Embossing Sandwich
1. A plate
2. 2 sheets cardstock to act as shim. Add extra pieces if needed.
3. B plate
4. Spellbinders™ die, blade side up
5. Paper or cardstock
6. Spellbinders™ Tan Emboss Mat
7. B plate
7. Roll through Cuttlebug™

Remember that each machine may be calibrated slightly different from the next. So experiment with your machine being certain not to force product through the rollers.

Friday, 10 August 2012

Friday Show & Tell #5.....with Ger

Ribbon Flower Tutorial


A circle of card is needed either from a punch or cut by hand


Add double sided tape to all of one side


Tie a knot to the ribbon you have chosen


Push knot into the middle of the card and start twisting the ribbon around on itself


At the same time as twisting lay down around itself on the card, keeping the sections close to one another so none of the white card is peeking through


Once all covered cut & glue underneath card as shown below


Attach your Ribbon Flower to your card as you would any other embellishment

Friday, 27 July 2012

Friday Show & Tell #4... with Jo

Hi everyone...
Today, I want to share a fantastic technique that is always popular at my demonstrations, and this is how to use your die cutters to create a fantastic shaped edge to your cards!

So to begin, choose your image, stamp and colour - or even use a topper or decoupage - the choice is yours! I have taken the FREE stamp that comes with this month's Creativity magasine... isn't she beautiful?!

Then choose the die for the shape you want the edge of your cards to be. I just love this doorplate nesting die because it flows really nicely and fits perfectly over the edge of my square card!


Cut out the card edge with the die, then stick the chosen image over the top... trim the excess from underneath so that both edges are the same shape.

I stick the two pieces of card together so that it has extra support.

This is what the finished edge will look like.. see below? You can see the join where I have attached my image to the card blank.


Butt up some paper next to the join where card meets card, then blue and trim to size at top and bottom.

Cut the edge slightly wider than the card, then fold back onto the rear of the card, stick down and decorate with a peel off.

Also remember to line the inside part of your card too - the shaped edge will reveal the section underneath, so make sure you add some paper to where it is visible.

Ink up the edges with colours to match your image - I chose yellow and lilac. The take a mini stamp from the same FREE pack of stamps and stamp lightly around the edge with yellow ink. Use a dry baby wipe to ink up the edges.

I hope you get some enjoyment out of playing with your dies, and come up with some wonderful shaped cards... if you do, remember to post your entries here so we can come and view your cards too!!!