Followers

Showing posts with label Becky. Show all posts

Monday, 6 August 2012

Monday Challenge Number 2

Well it's time for our second challenge :D the team are thrilled to bits to have had so many of you talented peeps join in with us for our 1st challenge, it was truly fantastic but made the job of choosing the winner and top three extremely hard.

Our 1st challenge winner is

430- Tracy

Well done please email your name & address to craftybn@gmail.com

The fabb 3 are

472, 6 & 131
Please bear with us whilst we find the links to the numbers! There was a problem with
Mr Linky, but they'll be posted very shortly!! Thank you for your patience.

Well done please take your winners badge for you blog

Congratulations to the winners and if it wasn't you this month please don't let it stop you from entering we have loved looking at everyones work and you never know next time it could be you. We really hope you are loving all the new features as much as we are and loving the great range of sponsors we have supporting us by offering fantastic prizes each month!!!

For this challenge it's a double whammy as we have two great sponsors

Sassy Studio are offering
FOUR fantastic images of the Winner's choosing

Cullen Crafts are offering a mixed bad of yummy craft goodies with products from Docrafts, Rubber Stamps, Ribbons & Washi Tape


Right below is the design teams take on the theme of Pink & Black with some of the team working with both sponsors products

All the items used in my creation are available at our sponsor this month Cullen Crafts
for more details please go to my blog by clicking on my name above :)


Sarah

Supplies
Bazzil 12 x 12 card stock-black Patterned paper-Pink Paisley, Teresa Collins, My mind’s eye, Stampin up-twitterpated Ribbon Handmade fimo flowers (Mold muse moulds) Bazzil on the edge strips Stampin up elegant Eleanor stamps Stampin up ink-pink and brown Hand felted flower Stampin up Labels collection framelets Chipboard Butterflies (Cullen Crafts)


Kaz
Supplies
Digi stamp Ava from Saturated Canary
Paper Love Letters First edition
Flowers and gems from Papermania.

Ger


Supplies
Inspire Me Card Pack
Creative Expressions Bling Swirl
Pirate Doily
Basil Bobble Trim
All from Cullen Crafts
Dilly Beans Digi

Becky

Supplies
Sassy Studio Designs digi image
Promarkers
Stampin' Up sentiment stamp

Caz
Supplies
Saturated Canary Digi Freebie "Ava"
Copics
Glossy Accents & White Pen
Heidi Swapp Sugar Chic Papers
Craftwork Cards Stardust Cardstock
Craftwork Cards Sentiment
Pins, Tulle & Bling


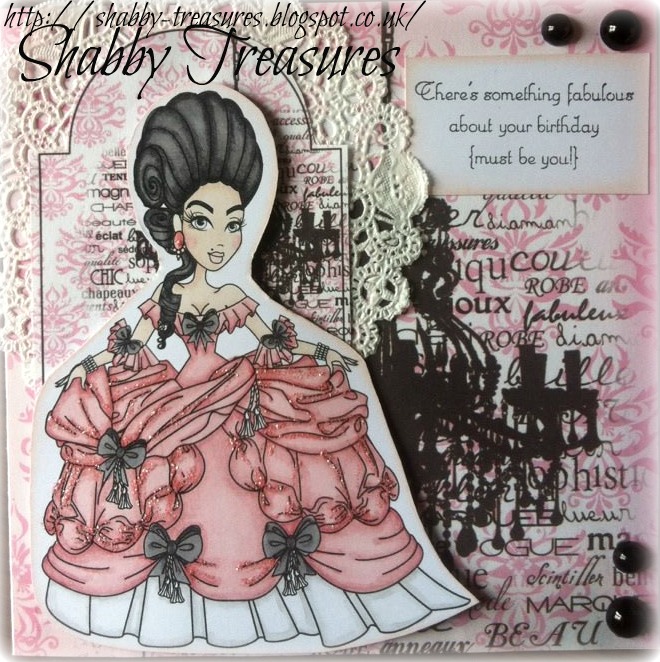
Image - Sassy Studios
Colouring - pastels, watercolour pencils
Swirls - Kanban stamps
Momento ink

Sunday, 22 July 2012

Friday Show & Tell #3.....with Becky

Hello Crafty Bloggers.
 Becky here and I am going to show you how to make a toilet roll mini album, before I start I just want to say a huge sorry to my fellow teamies as they have been very patient with me as things have been a bit crazy for me and I am behind on getting this post up so a huge sorry and also a thank you to them.

This is the way I do my toilet roll mini's but there are other ways these can be done, I am just showing you my techniques here.

Step 1:


Gather your loo roll tubes and decide how many you are going to use and flatten them, I usually run mine through my big shot a couple of times and leave something heavy on them over night.

Step 2:
prepare to paint-
The tubes can be sanded to get rid of any ridges although I don't usually bother as when the paper is on them you can not see any rough areas anyway.


I have used Wilko's acrylic paint in white and to apply it I use a blending sponge (I find the paint glides on better using that instead of a paint brush)

Step 3:
Paint-
Paint the edges of the tubes and also part of the way inside, There is no need to paint the whole of the tube if it is going to be covered with paper.


Step 4:
Cover -
Take your chosen paper and cut a piece very slightly smaller than the tube


I have used the Papermania Book Print paper pack and inked around the edges.

Then stick your paper to the tube


Repeat this on the other tubes and attach paper to both front and back.

Step 5-


Once you have followed these steps on all of the tubes it is time to embellish your album however you choose and bind it. To bind mine I use my Zutter bind-it-all.
You will also need to make the tags that will slot in the side,I simply do mine by cutting some card stock a little smaller than my tube.


and here is the finished result


This is my first tutorial so I hope I have done ok and the steps are easy to understand, If you have any questions you are welcome to contacts me and I will try to help you further.

More pictures of this mini can be found Here.

Happy crafting,
Becky xx

Monday, 16 July 2012

Design Team Inspiration Monday

Welcome to another Design Team Inspiration Monday with another lovely selection from the team, enjoy & Happy Crafting xxx


Ingredients:
Digital Stamp by Krista Smith of Saturated Canary
coloured with copics Y21, Y26 and Y28 for the hair,
R81, R83 and R 85 for the dress etc. and
E50, E51 and E00 for the skin with RV10
Spelbinders Labels 14
Papermania Capsule Collection Papers
Papermania Adhesive Stones
Daisy and Dandilion Message tags


Monday, 2 July 2012

Monday Challenge #1 Anything Goes

Welcome to the new look Crafty Bloggers Network & new look design team!!

We have all been working hard behind the scenes to bring you an new look, regular posts and exciting prize winning challenges.


First the design team, we have Jo, Ger, Becky, Kaz, Angela, Sarah and Caz, you'll find the blog links on the right hand side so please go have a peek at their fantastic creations.


Now are you sitting comfortably ;D

The challenges and the lovely added extras will be as follows-


1st Monday of the Month will be our Prize Challenge

1st Wednesday Guest Blogger Post
1st Friday Show & Tell Technique


2nd Monday Design Team Inspiration

2nd Wednesday Celebrity Guest Blogger
2nd Friday Show & Tell Technique


3rd Monday Design Team Inspiration

3rd Wednesday Guest Blogger Post
3rd Friday Show & Tell Technique


4th Monday Design Team Inspiration

4th Wednesday Celebrity Guest Blogger
4th Friday Show & Tell Technique


I hope your as excited about our new look as we are and hope you are all going to join in with the Anything Goes theme for the month, we have been very kindly sponsored by the fabulous


IndigoBlu


So here are the design teams take on 'Anything Goes'


Ger


Docrafts Papermania Beautiful- Embossing Folder, Papers, Fabric Buttons
Lucy Cromwell Rubber Stamp Sentiment
Own Made Faux Leather Background
Ranger Distress Ink Pad
Bling :D

Sarah


Supplies

Prima 6 x 6 paper pad: Meadow Lark
Distress ink: Brushed Corduory
Stampin up A4 Cardstock: Crumb and whisper white
Fiskars border punch
Mustard Gosgrain ribbon
Corner Edger
Handmade fimo flowers
Stampin classic ink pad: pink and blue
Stampin up Everything Eleanor stamp
Stampin up Creative Elements stamp
Penny Black thinking of you stamp


Jo

Supplies -
Papermania Kraft card
Papermania white card
Papermania Wellington toppers
Papermania Lucy Cromwell papers
Papermania Lucy Cromwell stamp
Ancient page ink


Kaz


supplies
Digi stamp from sassy design studio
card candy
papers trimcraft


Becky


Supplies:
Papermania Happy Days paper and big bloomers
Digi image from Pink Peticoat coloured with Promarkers and Copics

Caz

Supplies:
Small Bow Die by Lil' Inker Designs
Sentiment Stamp by There She Goes Clear Stamp
Black Shimmer Cardstock from Craftwork Cards
White Linen Cardstock from Papermill Shop
Clear Bling

Ang

Supplies:
Free stamp from Teddy Bo (coloured with distress markers) and free papers from magazines,
Cheery Lynn and Memory Box dies

--------------------

We would absolutely love to see all your creations please leave us a link to your entry. If you are joining us and don't have a blog then please take a look at the CBN group on Facebook and edit the document (found at the top of the page) for us to check out your entries. Please remember not to link to old work- we would love it if you can create something new. Happy Crafting!